Introduction
In this guide, we will walk through the process of adding a blog to a Nuxt 3.12 application using Wisp CMS. This article will cover everything from setting up the project, integrating Wisp CMS, to deploying your Nuxt application. Whether you're a seasoned developer or a newcomer, this step-by-step guide will provide you with all the necessary information to get your blog up and running.
What's New in Nuxt 3.12
Nuxt 3.12 comes with a plethora of enhancements aimed at improving performance, stability, and ease of use. Here are some of the key updates:
Nuxt 4 Compatibility Mode: You can now test out Nuxt 4 behavior by setting a flag in your
nuxt.config.tsfile. This allows for early adaptation and testing of upcoming features.Nuxt Scripts Auto-Install: Nuxt Scripts can now be auto-installed based on composables used within your project. This streamlines the setup process.
Layer Auto-Registration: Automatically registers layers within your project, simplifying the integration of modular components.
Built-in Accessibility Improvements: A new
<NuxtRouteAnnouncer>component anduseRouteAnnouncercomposable enhance accessibility features.Performance Improvements: Significant enhancements in module deduplication, Vite dev server start times, chunk determinism, and tree-shaking.
Multi-App Support: Experimental support for running multiple Nuxt app instances in parallel.
Stabilizing Experimental Features: Several previously experimental features have been stabilized and are now enabled by default, like
experimental.treeshakeClientOnlyandexperimental.configSchema.
For more detailed information, you can read the official release notes.
Setting Up the Project
Let's start by setting up a new Nuxt project.
Installing Nuxt 3.12
Begin by installing Nuxt 3.12. Open your terminal and run the following command:
npx nuxi init nuxt-blog
cd nuxt-blog
npm install
Project Structure
Understanding the project structure is essential for navigating and organizing your code effectively. Here’s an overview of the Nuxt directory structure:
assets/: Contains uncompiled assets such as Sass or JavaScript files.components/: Contains Vue components, making it easier to organize reusable parts of your UI.layouts/: Contains layout components that help define the structure of your pages. For example, you can create different layouts for authenticated users and anonymous users.pages/: Each file in this directory automatically becomes a route. The file-based routing system is one of Nuxt's core features.static/: Contains static files that are served from the root of the application. Files in this directory are not processed by Webpack.store/: Contains Vuex store files, if you’re using state management.
File-Based Routing
Nuxt's file-system-based routing creates a route for every file in the pages/ directory. The routes are generated based on the file name:
/pages
  |-- index.vue        // Corresponds to /
  |-- about.vue        // Corresponds to /about
  |-- blog/
      |-- index.vue    // Corresponds to /blog
      |-- [id].vue     // Corresponds to /blog/:id
You can create nested routes by organizing your files in nested directories.
NuxtPage
Nuxt provides the <NuxtPage> component to display pages located in the pages/ directory. You will need to modify app.vue to render the pages in the /pages directory:
<template>
  <div>
    <NuxtPage />
  </div>
</template>
Adding Wisp CMS to the Project
Installing the Wisp SDK
First, install the Wisp SDK using npm:
npm install @wisp-cms/clientConfiguring the Wisp Client
Create a new file wispClient.js in the plugins directory to configure the Wisp client:
import { buildWispClient } from '@wisp-cms/client'

export const wisp = buildWispClient({
  baseUrl: 'https://www.wisp.blog',
  blogId: process.env.WISP_BLOG_ID,
})

export default defineNuxtPlugin(() => {})
Make sure to add the WISP_BLOG_ID environment variable to your .env file:
WISP_BLOG_ID=your_blog_idFetching Content Using the Wisp API
Now that your client is set up, you can use it to fetch blog posts or tags from your Wisp blog. Here’s an example of how to fetch a list of blog posts:
const blogPostResult = await wisp.getPosts({ limit: 'all' })Adding Blog Post List Page
Creating the blog Page
Create a new file index.vue in the pages directory:
<template>
  <div>
    <h1>Blog</h1>
    <ul>
      <li v-for="post in posts" :key="post.id">
        <NuxtLink :to="`/blog/${post.slug}`">{{ post.title }}</NuxtLink>
      </li>
    </ul>
  </div>
</template>

<script setup>
import { onMounted, ref } from 'vue'
import { wisp } from '~/plugins/wispClient'

const posts = ref([])

onMounted(async () => {
  const response = await wisp.getPosts({ limit: 'all' })
  posts.value = response.posts
})
</script>
Basic Styling of the Blog List
Add some basic styles to the blog.vue page to make it look better. You can either use plain CSS or any preprocessor you prefer (e.g., SCSS).
<style scoped>
h1 {
font-size: 2em;
margin-bottom: 0.5em;
}
ul {
list-style: none;
padding: 0;
}
li {
margin-bottom: 0.5em;
}
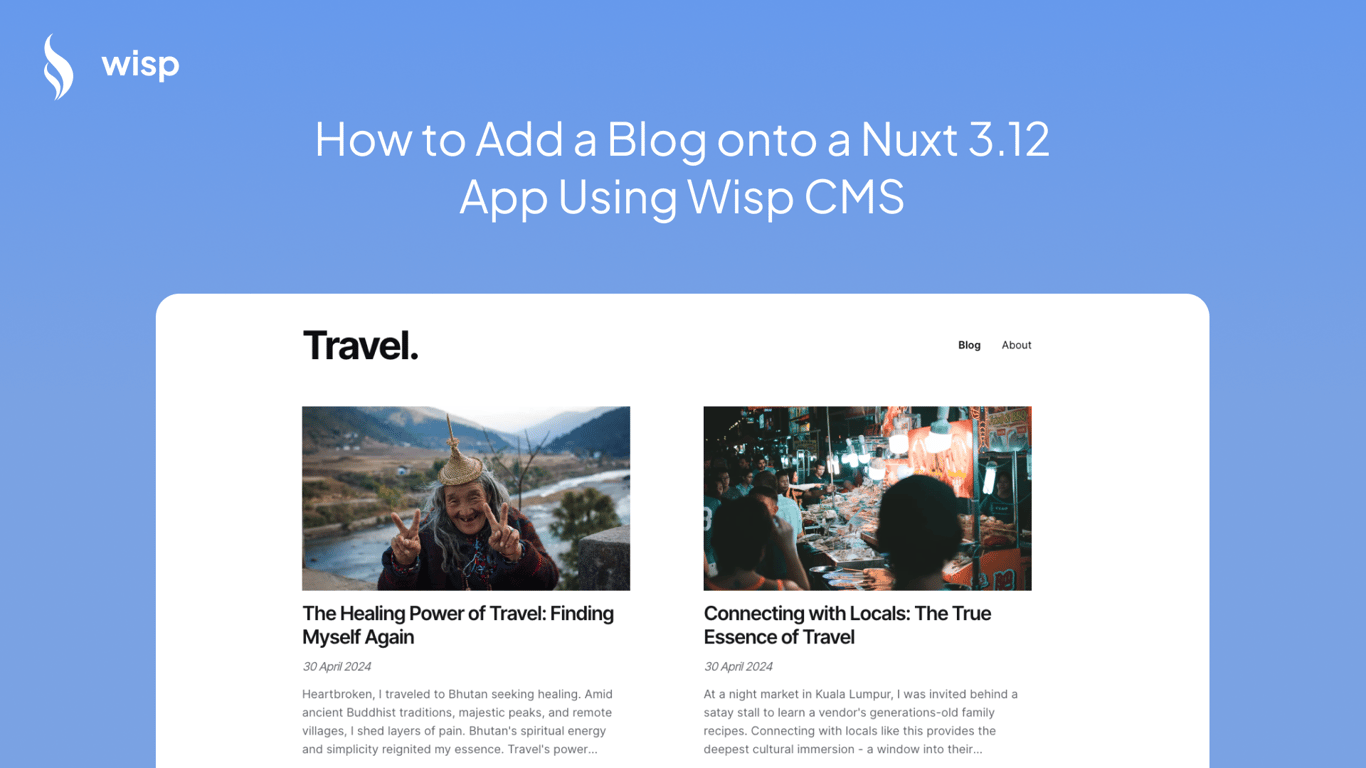
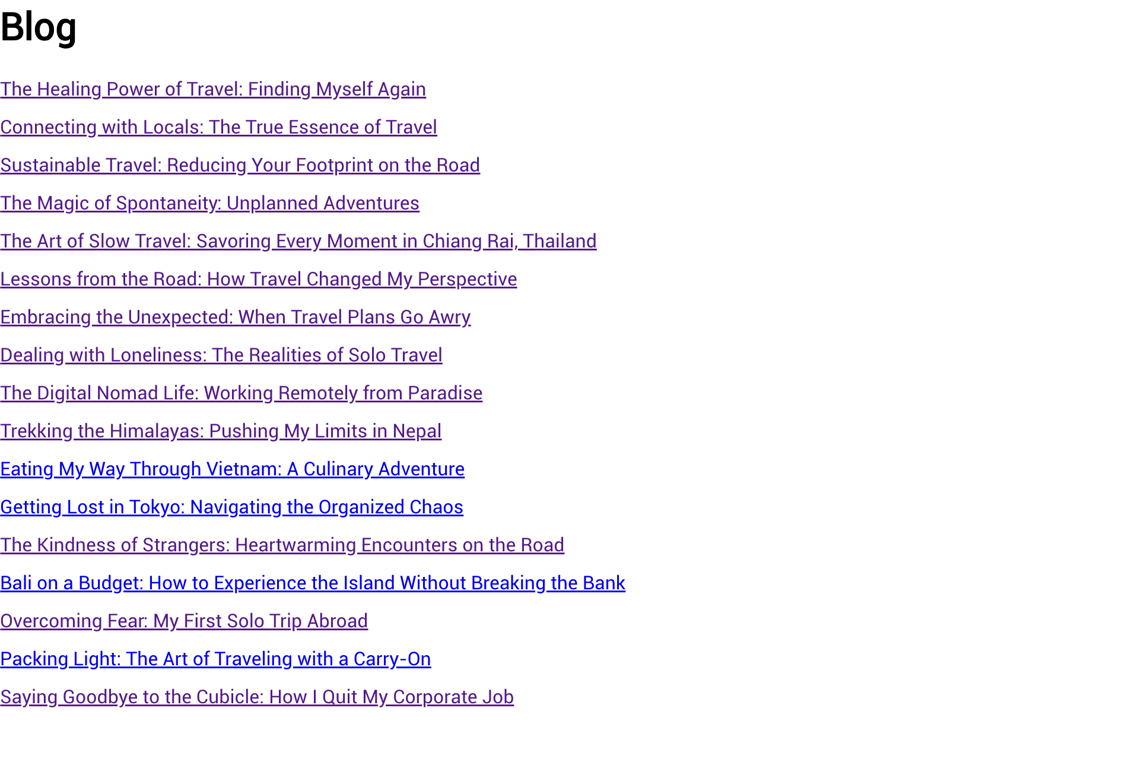
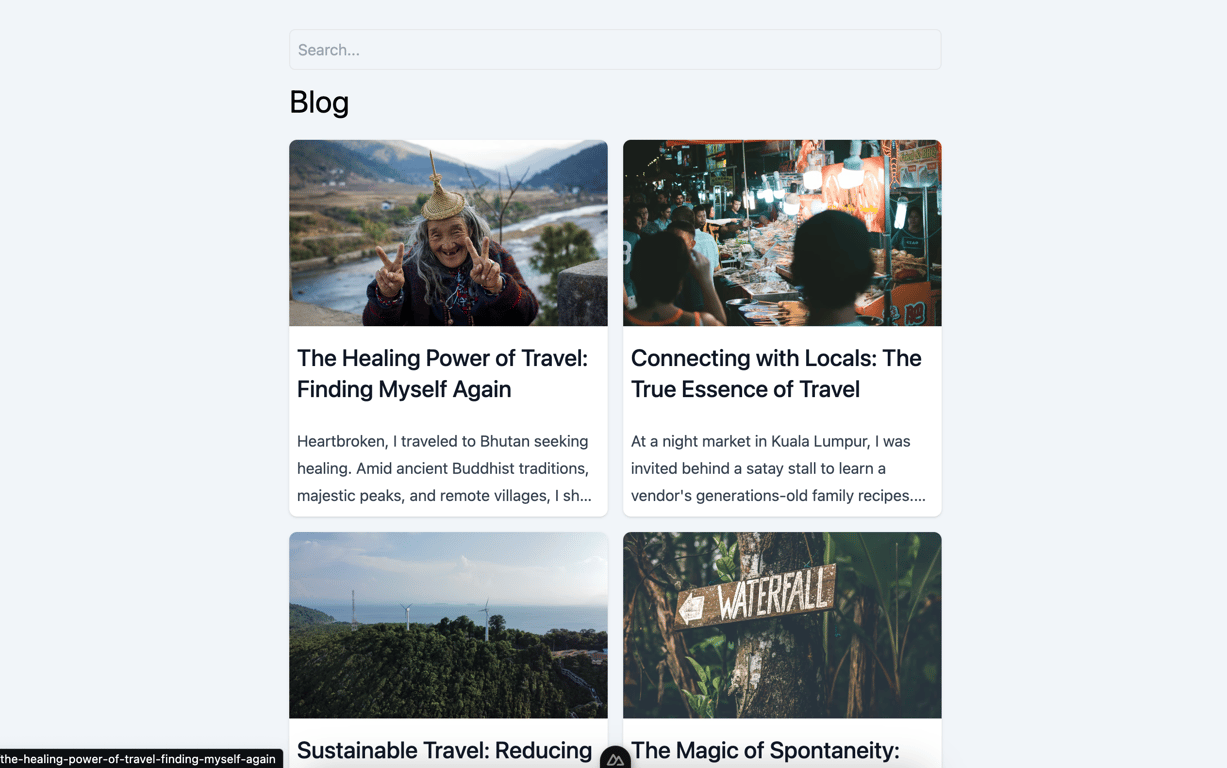
</style>This is how your page at http://localhost:3000/ should look right now, it should fetch a list of blog posts from your wisp account:
Adding Blog Post Page
Creating a Dynamic Route for Individual Blog Posts
Create a new file [slug].vue in the pages/blog directory. This file will be used to display individual blog posts based on their slug:
<template>
  <div v-if="post">
    <h1>{{ post.title }}</h1>
    <div v-html="post.content"></div>
  </div>
  <div v-else>
    <p>Loading...</p>
  </div>
</template>

<script setup>
import { onMounted, ref } from 'vue'
import { useRoute } from 'vue-router'
import { wisp } from '~/plugins/wispClient'

const route = useRoute()
const post = ref(null)

onMounted(async () => {
  const response = await wisp.getPost(route.params.slug)
  post.value = response.post
})
</script>

<style scoped>
h1 {
  font-size: 2em;
  margin-bottom: 0.5em;
}
img {
  max-width: 100%;
  height: auto;
  margin-bottom: 1em;
}
div {
  font-size: 1em;
  line-height: 1.6;
}
</style>
This is how your blog page should look like when you click into one of the blog post from the home page:

Adding Tags Page
Creating a tags Page
Create a new file index.vue in the pages/tags directory. This page will display all the tags available in your Wisp blog:
<template>
<div>
<h1>Tags</h1>
<ul>
<li v-for="tag in tags" :key="tag.id">
<NuxtLink :to="`/tags/${tag.name}`">{{ tag.name }}</NuxtLink>
</li>
</ul>
</div>
</template>
<script setup>
import { onMounted, ref } from 'vue'
import { wisp } from '~/plugins/wispClient'
const tags = ref([])
onMounted(async () => {
const response = await wisp.getTags()
tags.value = response.tags
})
</script>
<style scoped>
h1 {
font-size: 2em;
margin-bottom: 0.5em;
}
ul {
list-style: none;
padding: 0;
}
li {
margin-bottom: 0.5em;
}
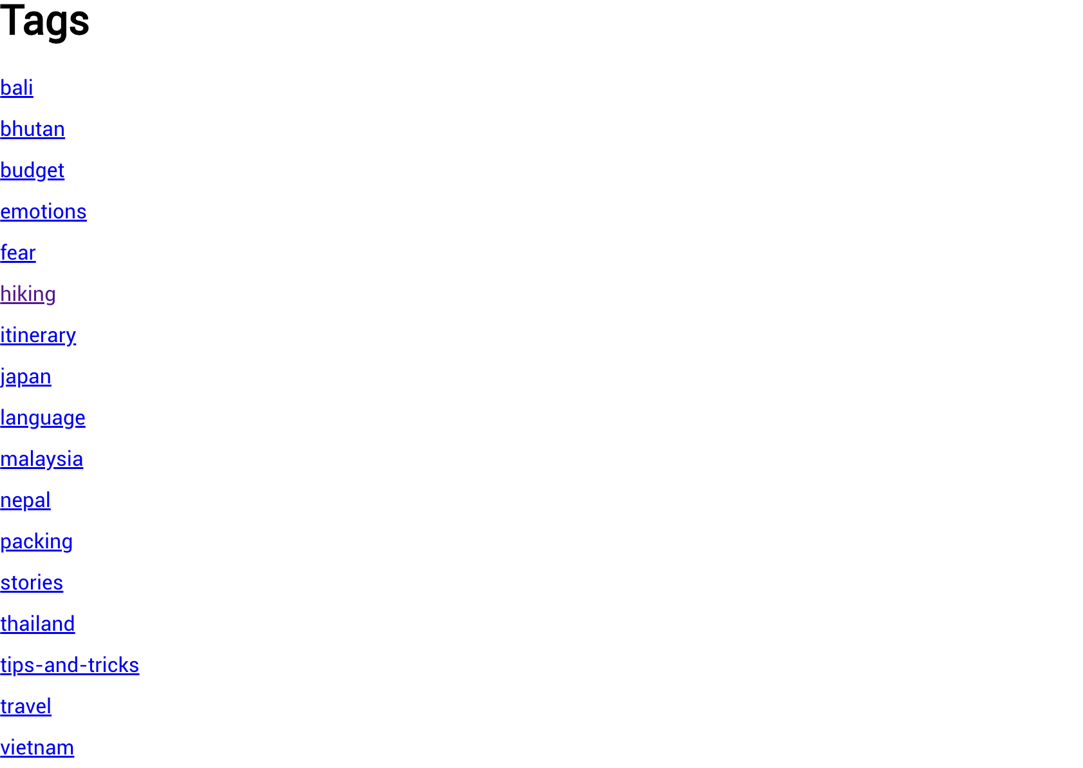
</style>This is how your tag page at http://localhost:3000/tags should look like:
Filtering Blog Posts by Tag
To filter blog posts by tag, create a new file [tag].vue in the pages/tags directory:
<template>
<div>
<h1>Posts Tagged: {{ route.params.tag }}</h1>
<ul>
<li v-for="post in filteredPosts" :key="post.id">
<NuxtLink :to="`/blog/${post.slug}`">{{ post.title }}</NuxtLink>
</li>
</ul>
</div>
</template>
<script setup>
import { onMounted, ref } from 'vue'
import { useRoute } from 'vue-router'
import { wisp } from '~/plugins/wispClient'
const route = useRoute()
const filteredPosts = ref([])
onMounted(async () => {
const response = await wisp.getPosts({ tag: route.params.tag })
filteredPosts.value = response.posts
})
</script>
<style scoped>
h1 {
font-size: 2em;
margin-bottom: 0.5em;
}
ul {
list-style: none;
padding: 0;
}
li {
margin-bottom: 0.5em;
}
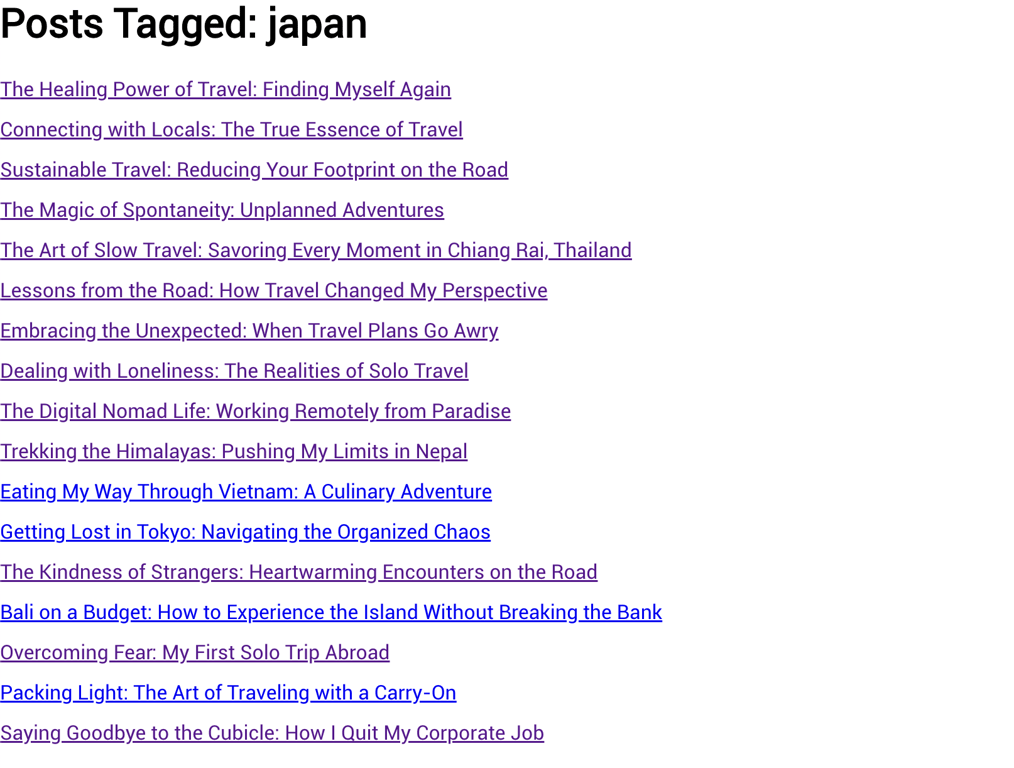
</style>This is how your filtered by tag page should look like:
Adding Search Functionality
Creating a Search Component
Let's create a search component that will allow users to search for blog posts. Create a new file SearchBar.vue in the components directory:
<template>
  <div>
    <input
      v-model="query"
      @keyup.enter="onSearch"
      placeholder="Search..."
    />
  </div>
</template>

<script setup>
import { ref } from 'vue'
import { useRouter } from 'vue-router'

const query = ref('')
const router = useRouter()

const onSearch = () => {
  if (query.value.trim()) {
    router.push({ path: '/search', query: { q: query.value.trim() } })
  }
}
</script>

<style scoped>
div {
  margin: 1em 0;
}
input {
  width: 100%;
  padding: 0.5em;
  font-size: 1em;
}
</style>
Implementing Search Functionality
Create a new file search.vue in the pages directory to handle the search results:
<template>
  <div>
    <h1>Search Results</h1>
    <ul v-if="posts.length">
      <li v-for="post in posts" :key="post.id">
        <NuxtLink :to="`/blog/${post.slug}`">{{ post.title }}</NuxtLink>
      </li>
    </ul>
    <p v-else>No results found.</p>
  </div>
</template>

<script setup>
import { ref, onMounted, watch } from 'vue'
import { useRoute } from 'vue-router'
import { wisp } from '~/plugins/wispClient'

const route = useRoute()
const posts = ref([])

const searchPosts = async (query) => {
  const response = await wisp.getPosts({ query })
  posts.value = response.posts
}

onMounted(() => {
  searchPosts(route.query.q)
})

watch(() => route.query.q, (newQuery) => {
  searchPosts(newQuery)
})
</script>

<style scoped>
h1 {
  font-size: 2em;
  margin-bottom: 0.5em;
}
ul {
  list-style: none;
  padding: 0;
}
li {
  margin-bottom: 0.5em;
}
p {
  font-size: 1em;
  font-style: italic;
}
</style>
Then, add the SearchBar component to your layout or header so it's accessible throughout the site. Learn more about layouts here.
<template>
<header>
<SearchBar />
<!-- other header content -->
</header>
</template>
<script setup>
import SearchBar from '~/components/SearchBar.vue'
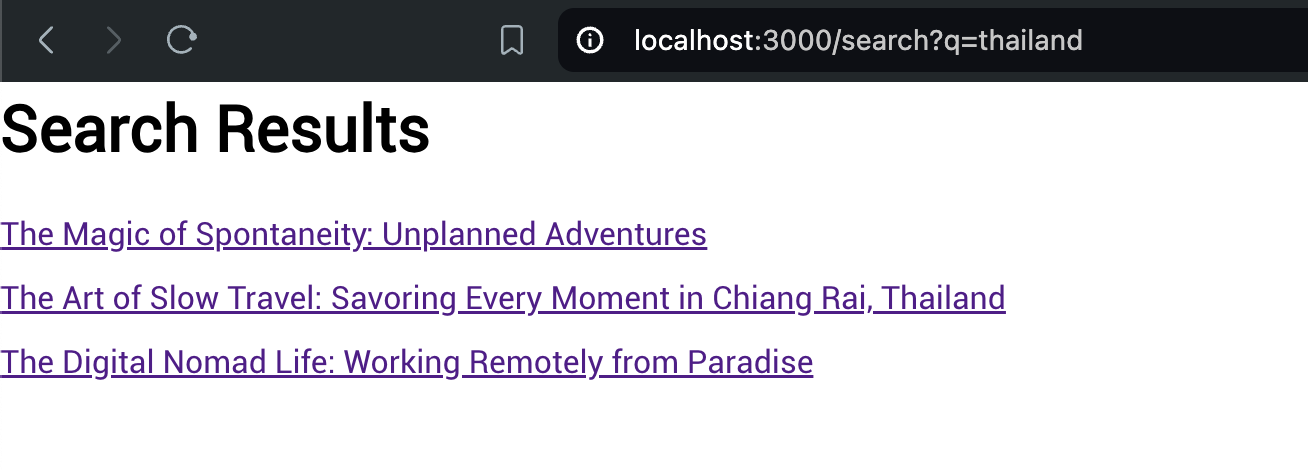
</script>Your search result page should now look like this:
Adding Related Blog Posts
Fetching Related Blog Posts
To display related blog posts, you need to fetch them using the Wisp API. Add the following code to your [slug].vue file:
<template>
<div v-if="post">
<h1>{{ post.title }}</h1>
<div v-html="post.content"></div>
<h2>Related Posts</h2>
<ul>
<li v-for="relatedPost in relatedPosts" :key="relatedPost.id">
<NuxtLink :to="`/blog/${relatedPost.slug}`">{{ relatedPost.title }}</NuxtLink>
</li>
</ul>
</div>
<div v-else>
<p>Loading...</p>
</div>
</template>
<script setup>
import { onMounted, ref } from 'vue'
import { useRoute } from 'vue-router'
import { wisp } from '~/plugins/wispClient'
const route = useRoute()
const post = ref(null)
const relatedPosts = ref([])
onMounted(async () => {
const response = await wisp.getPost(route.params.slug)
post.value = response.post
const relatedResponse = await wisp.getRelatedPosts({ slug: route.params.slug, limit: 5 })
relatedPosts.value = relatedResponse.posts
})
</script>
<style scoped>
h1 {
font-size: 2em;
margin-bottom: 0.5em;
}
h2 {
font-size: 1.5em;
margin-top: 2em;
}
img {
max-width: 100%;
height: auto;
margin-bottom: 1em;
}
ul {
list-style: none;
padding: 0;
}
li {
margin-bottom: 0.5em;
}
div {
font-size: 1em;
line-height: 1.6;
}
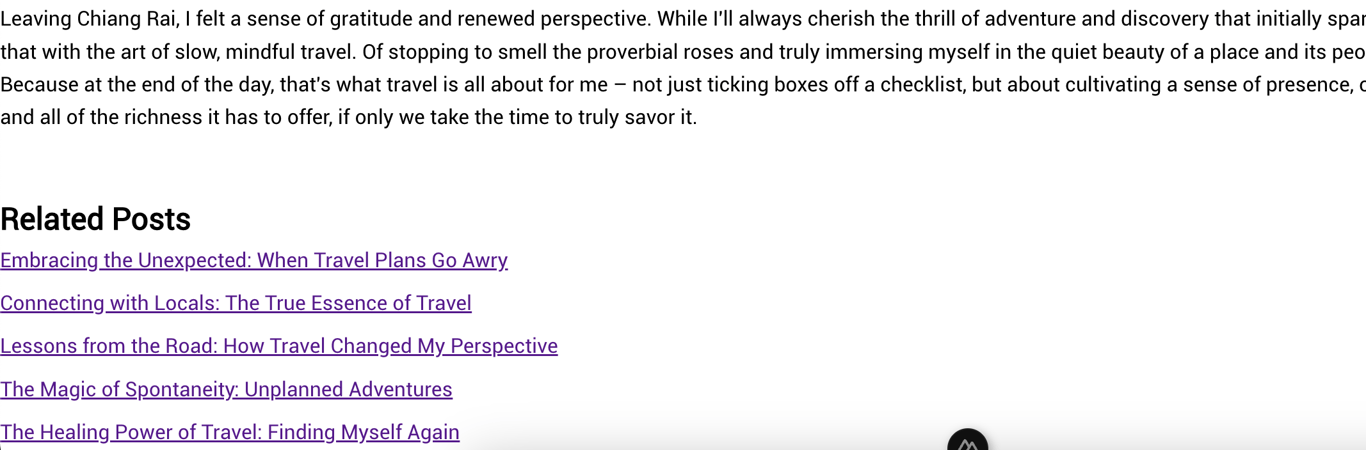
</style>You should now see a new section below your blog page:
Additional Considerations
Styling
As we did not cover styling or specific UI component library that you can use, you can check out libraries like vuetify or tailwind to style the page in ways that suite you.
Alternatively, you can see how to implement some basic styling using tailwind in this commit. You may wish to follow along this tailwind guide.
SEO Optimization
Search Engine Optimization (SEO) is crucial for the visibility of your blog. Nuxt provides powerful tools to enhance your app's SEO. Here are some best practices:
Using the head Property
You can add meta tags to your pages using the head property in your components:
<script setup>
import { useHead } from '@vueuse/head'

useHead({
  title: 'My Blog Post',
  meta: [
    { name: 'description', content: 'This is an amazing blog post about...' },
    { property: 'og:title', content: 'My Blog Post' },
    { property: 'og:description', content: 'This is an amazing blog post about...' },
    { property: 'og:image', content: 'https://example.com/image.jpg' },
  ],
})
</script>
Dynamic Meta Tags
For dynamic pages like blog posts, you can set meta tags based on the content:
<script setup>
import { useHead } from '@vueuse/head'
import { ref, onMounted } from 'vue'
import { useRoute } from 'vue-router'
import { wisp } from '~/plugins/wispClient'

const route = useRoute()
const post = ref(null)

onMounted(async () => {
  const response = await wisp.getPost(route.params.slug)
  post.value = response.post

  useHead({
    title: post.value.title,
    meta: [
      { name: 'description', content: post.value.description },
      { property: 'og:title', content: post.value.title },
      { property: 'og:description', content: post.value.description },
      { property: 'og:image', content: post.value.image },
    ],
  })
})
</script>
Sitemap Generation
Consider generating a sitemap to help search engines index your pages. You can use the @nuxtjs/sitemap module for this. Install it using npm:
npm install @nuxtjs/sitemapAdd it to your nuxt.config.ts:
export default defineNuxtConfig({
  modules: [
    '@nuxtjs/sitemap',
  ],
  sitemap: {
    hostname: 'https://yourwebsite.com',
    routes: async () => {
      const { posts } = await wisp.getPosts({ limit: 'all' })
      return posts.map(post => `/blog/${post.slug}`)
    },
  },
})
Accessibility Improvements
Accessibility is about making your web content usable to as many people as possible. Here are some tips:
Use Semantic HTML
Make sure to use semantic HTML elements like <header>, <nav>, <main>, and <footer>. These elements help screen readers understand the structure of your page.
ARIA Attributes
Use ARIA (Accessible Rich Internet Applications) attributes to provide additional information to users with disabilities. For example:
<img src="image.jpg" alt="A descriptive text of the image" aria-label="Image of ..." />Keyboard Navigation
Ensure that all interactive elements are accessible via keyboard. This can be achieved by setting the tabindex attribute and handling keydown events.
Performance Tuning
Improving the performance of your Nuxt application can greatly enhance user experience. Here are some tips:
Lazy Loading Components
Lazy load components that are not immediately necessary. This can reduce the initial load time of your application:
export default {
  components: {
    LazyComponent: () => import('~/components/LazyComponent.vue'),
  },
}
Optimizing Images
Use optimized images to reduce load times. Consider using modern image formats like WebP and tools like ImageMagick for optimization.
Code Splitting
Take advantage of Nuxt’s automatic code splitting to minimize the amount of JavaScript loaded on the initial page load. Ensure that your code is structured in a way that maximizes this feature.
Hosting the Project
Preparing for Deployment
Before deploying your Nuxt application, make sure to build it for production:
npm run buildDeploying to Vercel
Vercel is a great choice for hosting Nuxt applications. Follow these steps to deploy your project to Vercel:
Install the Vercel CLI:
npm install -g vercelRun the
vercelcommand in your project directory and follow the prompts:vercelVercel will automatically detect your Nuxt project and set up the appropriate build and deployment settings.
Deploying to Netlify
Netlify is another excellent hosting provider. Follow these steps to deploy your project to Netlify:
Create a
netlify.tomlfile in the root of your project with the following content:[build] publish = "dist" command = "npm run build" [[redirects]] from = "/" to = "/index.html" status = 200Install the Netlify CLI:
npm install -g netlify-cliRun the
netlify deploycommand in your project directory and follow the prompts:netlify deployOnce configured, you can run
netlify deploy --prodto deploy your site to production.
Conclusion
In this article, we covered how to add a blog to a Nuxt 3.12 application using Wisp CMS. We started by setting up the project, then integrated Wisp CMS, and finally added functionality for listing blog posts, viewing individual posts, searching, filtering by tags, and displaying related posts. We also discussed additional considerations for SEO, accessibility, and performance, and explored how to deploy the project to popular hosting services like Vercel and Netlify.
With these steps, you should be well-equipped to create a fully functional blog in your Nuxt application. Happy coding!